Creating a Personal Message Group using the Database Method
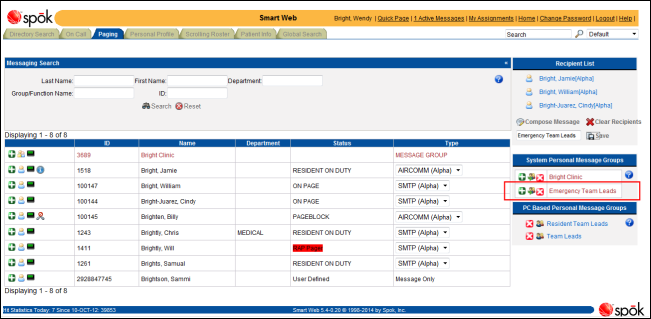
Personal message groups using cookies are created in the System Personal Message Group section in the Paging screen.
When Smart Web is configured to use the database format, the user must be logged into Smart Web to be able to create personal message groups. These personal message groups can also be viewed and edited in Smart Center by users assigned the appropriate privileges.
1. Access Smart Web.
2. Choose the Paging tab to display the Paging screen.
3. Find and select the recipients that should be included in the personal message group, just as you would to select message recipients. For more information, please refer to Sending a Page to Multiple Recipients.
4. Page recipients can be removed from the recipient list if they should not receive the page. Click on a person’s or function’s name to remove that individual.
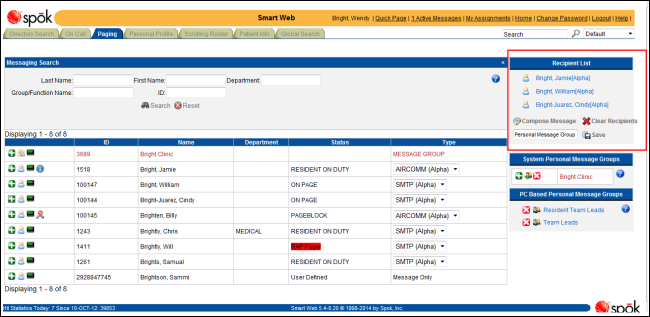
5. When all page recipients have been selected, the personal message group can be named and saved. In the name field beneath the recipient list, enter a unique name for the personal message group.
The personal message group should have a unique name. If a user creates a personal message group and gives it the name of a personal message group that is currently available, the new personal message group overwrites the existing personal message group.
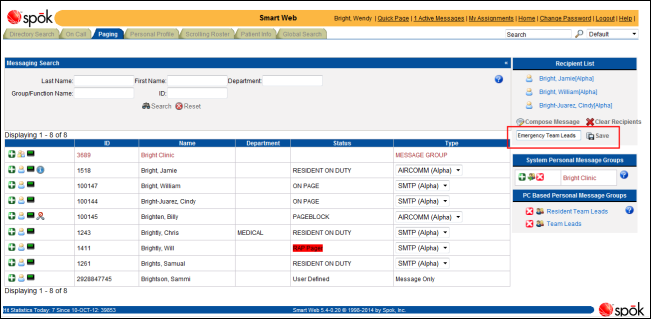
6. Click the Save button to save the personal message group. The group is added to the list of groups in the System Personal Message Groups section, and a message dialog displays.

7. Click the OK button to close the message dialog and display the updated Paging screen.