Updating the Members in an On-Call Group
The members of an on-call group can be removed or new members added. The on-all group does not need to have any scheduled assignments when the members are updated.
1. Access Smart Web.
2. Choose the On-Call tab.
3. Choose the Scheduler Assignment tab, and log in if you have not already logged in.
4. Search for the on-call group that has the members you want to update.
5. Click on the name of the on-call group in the Search Results section. The on-call group does not need to have any scheduled assignments.
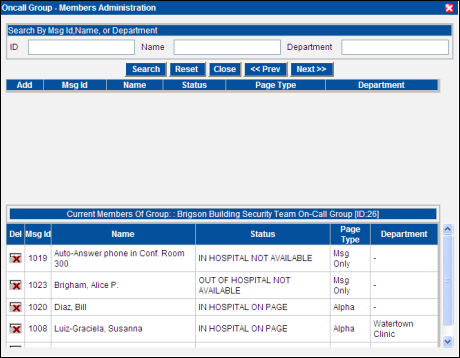
6.  Click the Members button. The
On-Call Group – Members Administration dialog displays. The current
members of the on-call group display in the Current Members of Group
section at the bottom of the dialog. The on-call group name and listing ID
is included as part of the section name.
Click the Members button. The
On-Call Group – Members Administration dialog displays. The current
members of the on-call group display in the Current Members of Group
section at the bottom of the dialog. The on-call group name and listing ID
is included as part of the section name.
7. Search for a member that should be added to the group.
a. Enter a partial or full messaging ID, name, or department in the ID, Name, or Department field. A combination of the fields can be used to limit the records returned by the search.
b. Click the Search field. The records that match the search string display in the search results section.
NOTE: The search results include names that are already selected as members of the on-call group. Current members are not filtered out of the search results.
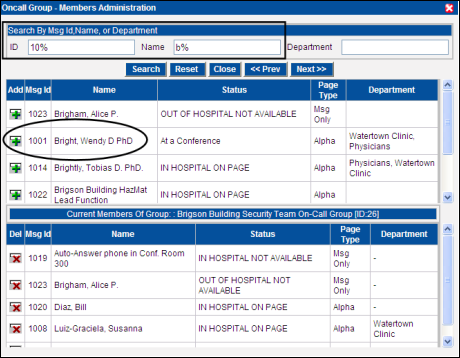
c. Click on the green plus sign icon in the Add column next to the name you want to add to the on-call group. A confirmation dialog displays.
NOTE: If the name selected is already a member of the on-call group, a warning message displays and the individual is not added to the on-call group again.
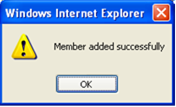
d. Click the OK button. The person or function added to the on-call group displays in the member list.
NOTE: The name that was added displays in both the search results list and in the on-call group members list. The search list always shows every individual that can be included in an on-call group, even if the individual is a member of the group.
8. A member can be removed from the on-call group.
a. Click the red X sign icon in the Del column next to the name you want to delete.
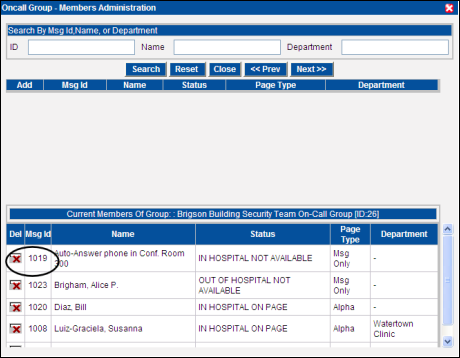
b. A confirmation dialog displays. Click on the OK button to close the dialog and update the screen.