Selecting Multiple Recipients
A page can be sent to any set of people, functions, on-call groups, message groups, and personal message groups selected in the Paging screen. As the page recipients are selected, the recipients display in the Recipient List section. When an on-call group is selected, the people currently on-call are included in the recipient list.
NOTE: When paging an on-call group, message group, or a personal message group member on a device that is registered with Spok Mobile, note that if there are any attachments to the message, such as a picture, the message will not be sent. For best results, do not add attachments to a message that may be sent to a Spok Mobile device.
1. Access Smart Web.
2. Choose the Paging tab to display the Paging screen.
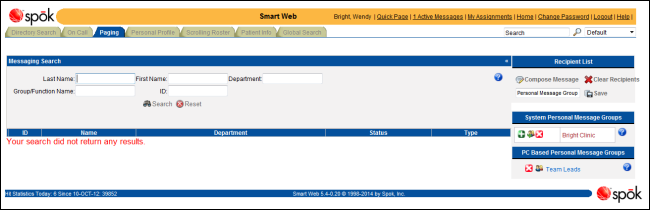
3. People can be searched for using the Last Name, First Name, Department, and ID fields. More than one of the search fields can be used to further limit the search results.
a. Enter the search criteria for a person in the Last Name, First Name, Department, and ID fields.
b. Click the Search button to perform the search. The individuals that match the search criteria display in the search results section.
4. Click on the green plus sign icon to select the page recipients. As page recipients are selected, they display in the Recipients List on the right side of the screen. The device type the page will be sent to displays in brackets after the person’s name.
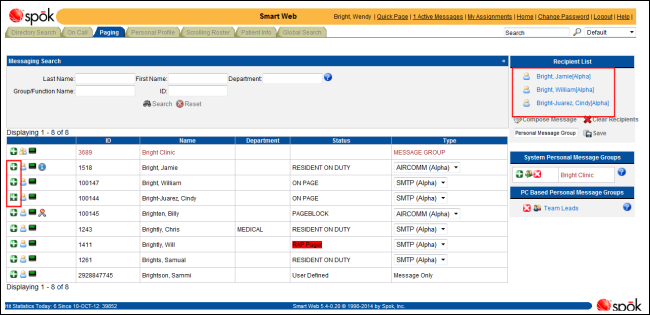
5. A message group can be searched for using the Group/Function Name field. When a message group is selected, the page is sent to every message group member. The message group members can be displayed in the recipient list after the group has been selected.
a. Enter the search criteria for a message group in the Group/Function Name field.
b. Click the Search button to perform the search. The message groups, on-call groups, and functions that match the search criteria display in the search results section. For the message groups, MESSAGE GROUP displays in the Type column. You can also look for the message group icon.

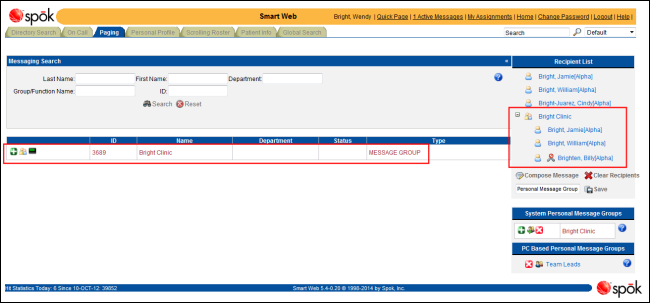
c. Click on the green plus sign icon to select a message group. The selected message groups display in the Recipients List on the right side of the screen. You can click the plus sign next to the message group name to display the members. The device type the page will be sent to displays in brackets after the person’s name.
NOTE: A message group member may already be included in the list of recipients. If this is the case, the system does not send duplicate pages. The person receives only one page when the page is sent.
6. An on-call group can be searched for using the Group/Function Name field. When an on-call group is selected, the page is sent to the individuals currently on call. If no-one is on-call, a warning message displays and the on-call group cannot be added to the recipient list.
a. Enter the search criteria for an on-call group in the Group/Function Name field.
b. Click the Search button to perform the search. The message groups, on-call groups, and functions that match the search criteria display in the search results section. For the on-call groups, ON CALL GROUP displays in the Type column. You can also look for the on-call group icon.

c. Click on the green plus sign icon to select an on-call group. The selected on-call group displays in the Recipients List on the right side of the screen. You can click the plus sign next to the on-call group name to display the people currently on-call. The device type the page will be sent to displays in brackets after the person’s name.
NOTE: A person on-call may already be included in the list of recipients. If this is the case, the system does not send duplicate pages. The person receives only one page when the page is sent.
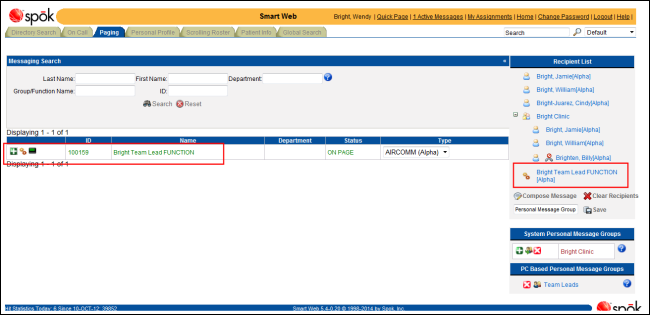
7. A function can be searched for using the Group/Function Name field.
a. Enter the search criteria for a function in the Group/Function Name field.
b. Click the Search button to perform the search. The message groups, on-call groups, and functions that match the search criteria display in the search results section. For the on-call groups, ON CALL GROUP displays in the Type column. You can also look for the on-call group icon.

c. Click on the green plus sign icon to select a function. The selected function displays in the Recipients List on the right side of the screen. The device type the page will be sent to displays in brackets after the function’s name.
8. A personal message group can be selected as a page recipient. In the System Personal Message Groups section or the PC Based Personal Message Groups section, click on the name of the personal message group you want to page. All individuals in the group are included in the recipient list. The name of the personal message group is not included in the list.
For information about creating personal message groups, please refer to Working with Personal Message Groups.
9. Page recipients can be removed from the recipient list if they should not receive the page.
• Click on a person’s or function’s name to remove that individual.
• Click on the name of a message group or on-call group to remove all the members of the group.
• To remove a few members of a message group or an on-call group, click on the plus sign next to the group name in the recipient list to display a list of group members. Click on a name to remove that individual.
10. When all page recipients have been selected, click the Compose Message button to send the message. Depending on whether the selected individual, the individuals in the message group, or the on-call group member(s) currently on call can receive a page or a message, the Compose a Message screen for either the page or the message displays.
For examples of each type of paging or message screen, please refer to Page Type Examples: Numeric, Alphanumeric, and Message Only.
11. Click the Send Message button to send the page or message. A confirmation dialog displays. The total number of recipients and messages sent is noted in the dialog.
NOTE: Your system may be configured to display a different message than the default message shown below, or configured so that a confirmation dialog does not display at all.
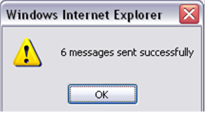
12. Click the OK button to close the confirmation dialog.